Tuesday - 1st August
Progress has been slow. I got married in May,
so most of the year leading up to that I was busy doing wedding stuff, so
the car got neglected.

Then I had a honeymoon, came back to normal life and had to do a few
things around the house.
Now, finally, I've had a chance to work on the car again!
So in my last post I had all the dash finished, and the main climate
control unit fitted, but didn't know where to fit the fan.
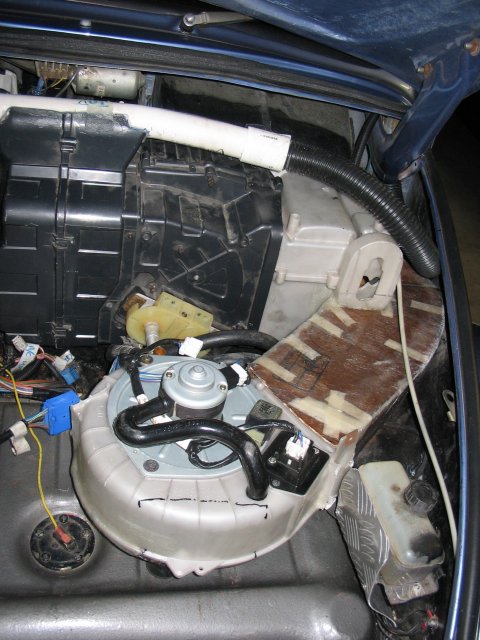
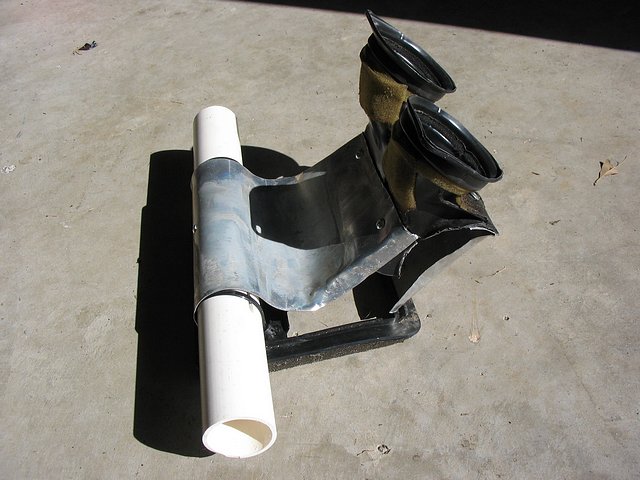
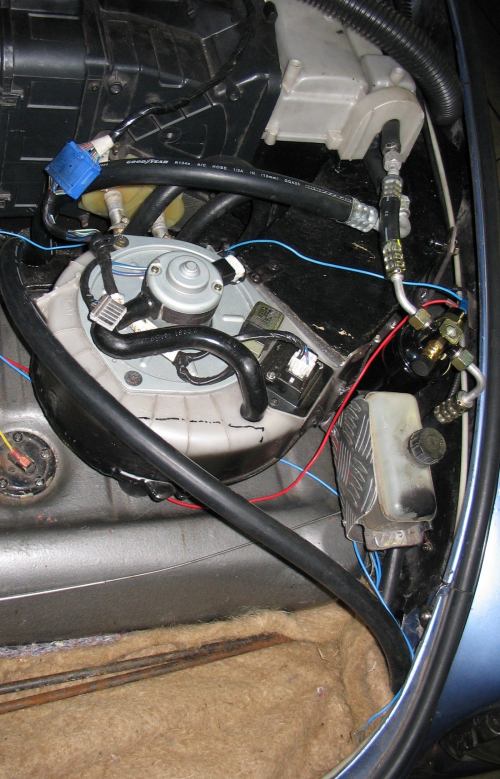
After a lot of thinking, I decided to pull the fan apart a bit more. It
was fitted with a servo actuated flap that selected inside and outside
air. I have pull that off, and may mount it somewhere else later. but
pulling it off it made the fan a lot smaller.

The fan did have a steel plate mounted as part of the casing before the
flap, so it was almost a sealed unit when pulled apart. But it had a
section where the metal was missing, so I fiberglassed over that part. I
welded old wheel studs onto the metal plate and put rubber table leg
covers on the wheel studs. This lets the fan sit on the fuel tank.

Unfortunately the brake fluid reservoir was in
the way of the fan and ducting, so I had to relocate it. Quite a pain.
Then I put the fan in place and started making a cardboard duct.

You can also see a bit of PVC pipe and 32NB flexible hoses, these are the
demister lines and connect to the vents at the corner of the windscreen.
Making the cardboard duct was difficult, mainly because I had to make sure
it cleared the bonnet hinge.

Once I had it made up with cardboard, masking tape and hot glue, I could
start fibre-glassing. I don't really like fibre-glassing, it's a messing
job, but I seem to do a fair bit of it. It will take a while to finish all
the fibre-glassing.
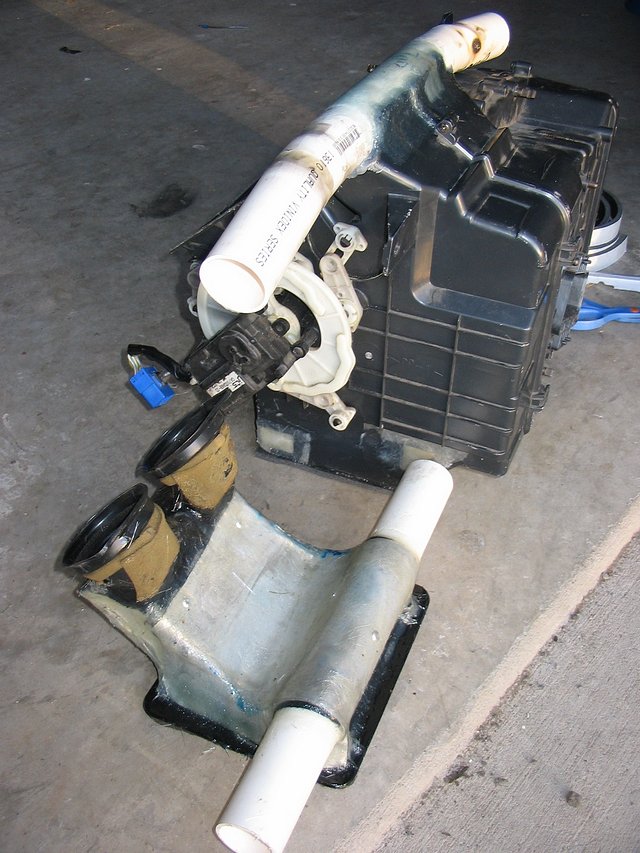
I also soldered copper water piping elbows onto the heater unit. This lets
the water pipes turn up and clear the fan.

Saturday - 5th August
Ferrari vs Baja Comparison Review moved to here
Anyway, back to the climate control. I didn't get a lot done this weekend. I finished fibre-glassing the duct, and it fits! Now I have to make all the little ducts to the internal vents. I have the demister connections done, but the 4 vents are more painful.
I have started by getting the original MX5 and MX6 ducting and modifying it to mostly fit. Then I'll either have to rivet extra plates and pieces in, or fibre glass again. I borrowed a hole saw to cut through to the lower vents and add some flexible hose, but I borrowed the wrong size hole saw :(
Wednesday - 16th August
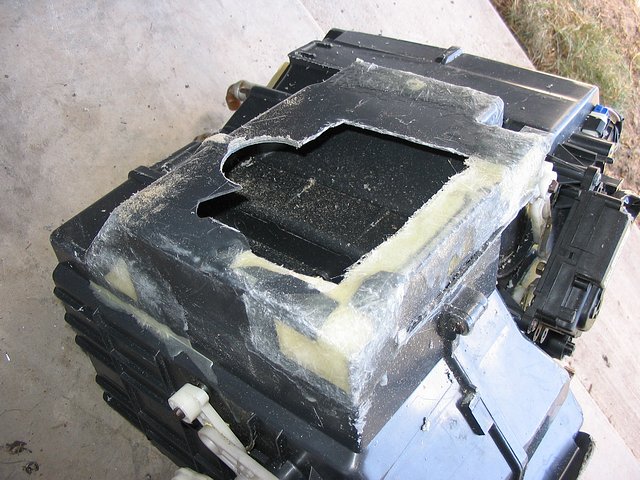
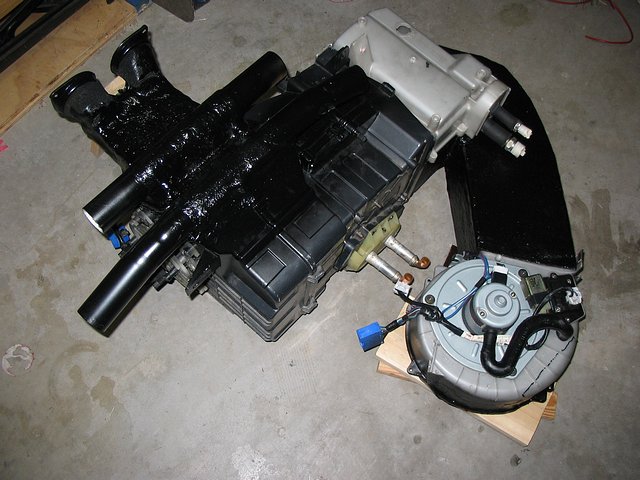
More work and fibreglassing. I had to modify the main AC unit to change where the feet air goes. The original set-up went into weird flat square plastic ducts that went under the carpet to the rear seats, and out side vents under the dash. I had to cover all those holes with fibreglass and make a new big hole out the bottom. I later put compressible foam strips around the hole to make it seal once it's installed.
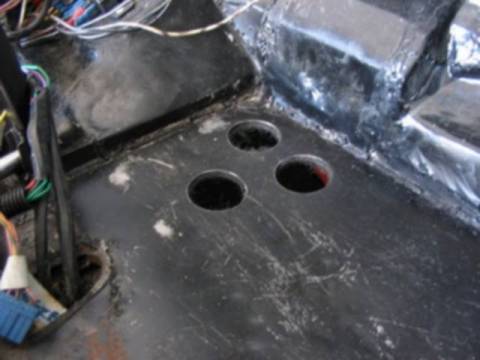
And below are the 3 holes that I cut for the big foot air vent to blow through.
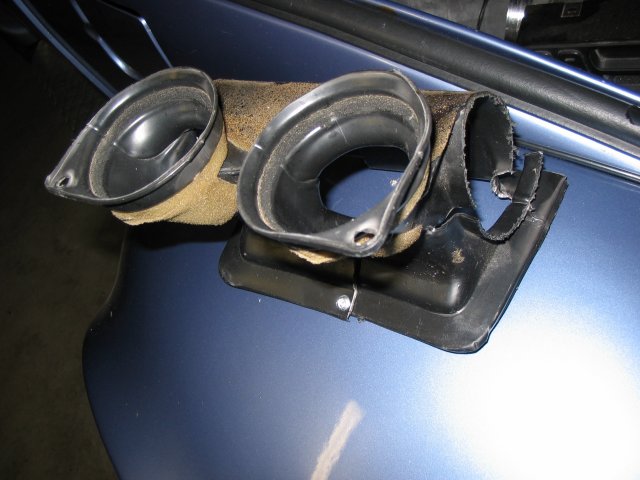
Then I had to start work on the ducting to go from the main unit to the in dash head/body vents. I used the Mazda MX5 (Miata) duct that connects to the rear of the in dash vents, the MX6 square duct piece that connects to the main duct body, and made the ducting in between using roof flashing. The PVC pipe is to run flexible hoses out to the sides to go to the side head/body vents.
After I had the metal parts made and trial fitted it (about a hundred times), I covered it in fibreglass (as the roof flashing isn't very strong). I also fibreglasses the demister PVC tube onto the main unit.
And below is the whole assembly sitting together. I painted it all black as you can see.
Hopefully on the weekend I will install everything in the car. I just have to make up some support brackets to hold everything in place (so it doesn't move around when I brake and corner).
Saturday - 19th August
I managed to get it all mounted in the car today. I bought some 32NB flexible piping for the side air vents, but they had ran out of the black pipe so I now have a combination of black and white pipe which looks a bit odd.
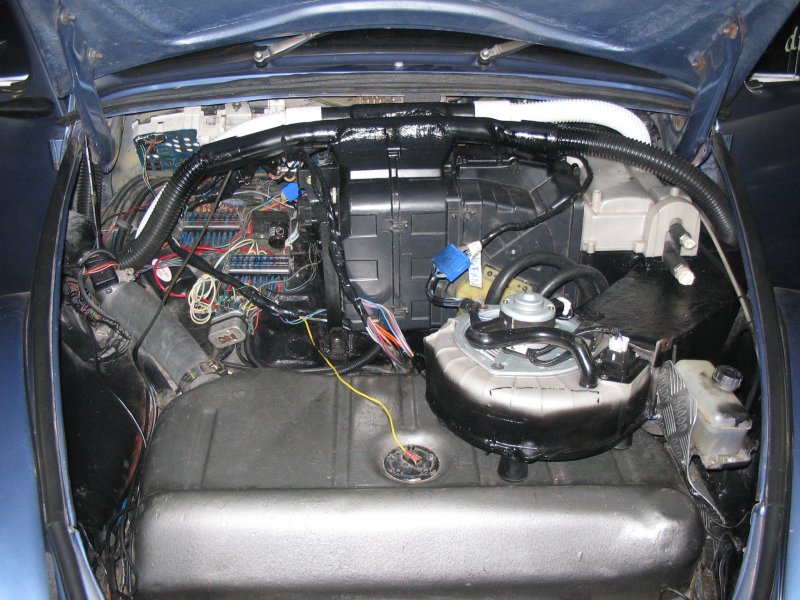
I looks messy, but it's tricky to make it neater. There's just a lot of wires, and a lot of ducting! You can see the two air con lines on the right above the fibreglass duct. They will be connected once I get the condensor mounted on the bull bar. I still have to make a few more brackets to make sure everything stays still when I hit big bumps offroad.
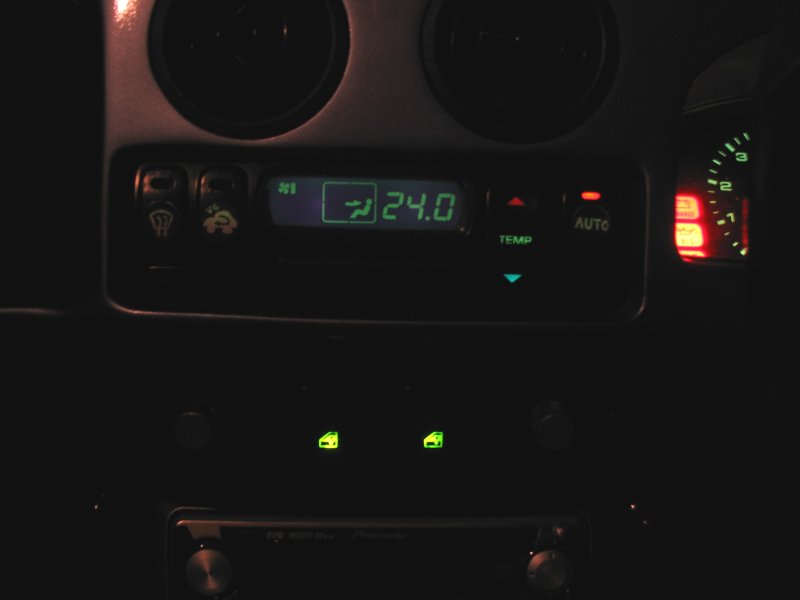
Above are some shots of the digital climate control in action. At the moment I don't have the air conditioning part set-up, so it is currently just normal air or heating. I'm glad that it all seems to work so far. Set it to a temp below ambient and it blows normal air, set it to a temp above ambient and heated air comes out. It varies the fan speed depending on how far from the ambient temp it is set. The feet, body and demister settings all work and operate the ducting flaps correctly. It is certainly a cool toy to play with.
Saturday - 26th August
I decided to fast track the last part of the
climate control and drop into Custom
Offroad for some assistance. Brad made some new bull bar support
brackets (the old brackets were complete crap). The new brackets are use
to mount the condensor on. We decided to put the condensor in the nose
cone in the end, and I cut about 80mm off the bottom of the nose cone to
help with air flow.
The main problem I am having is the half jut was 92/93 so it used R12, and
now it has to be converted to the new R134a. This means all no o-rings (no
probs) plus new dryer, new filling fittings, possibly new expansion valve.
Brad had run the R134a hoses from front to back, and now they need the
special fittings added on each end. Unfortunately air con hose isn't
cheap, about $20/m. Not cheap when running from the back to the front of
the Baja, and back again.
Then the air con shop has to thoroughly flush all the lines and components
to ensure there is absolutely no old R12 lubricating oil left in the
system before they can refill it with R134a. Hopefully this will happen
during the week.
So the air con is proving to be more painful than the engine conversion
itself
But it should be just as rewarding ![]()
Tuesday - 29th August
Some piccies after a trip to the air con shop. New and old dryer;

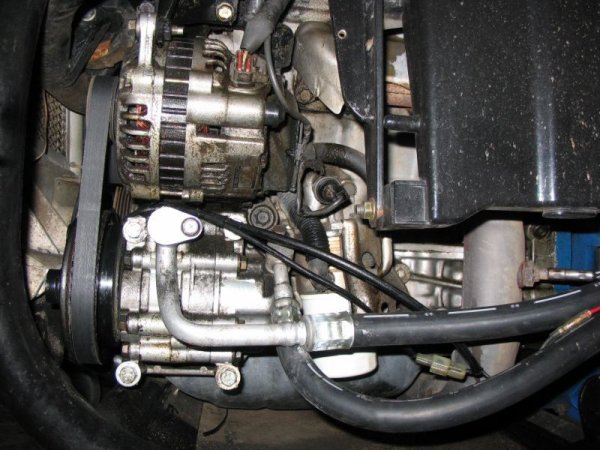
Compressor cleaned and ready to go (new seals and stuff)

Evaporator cleaned and fitted with a new expansion valve (for the R134a gas)

Evaporator in duct

Condensor flushed out and ready to go. Thermo needs mounting.

New bull bar braces tacked in test position. Lower part of nose cone trimmed.

Friday
- 1st September (I know, it's not quite August)
Well, after a huge amount of
effort, I can now happily say I have working automatic digital climate
control! Hmmm, perhaps I am the only person in the world with enough
patience to put automatic digital climate control in an old 60's era
Volkswagen Beetle (or Baja).
![]()
It gets the air coming out the vents down to about 6 degrees (celcius) ![]()
The hose lady took about 4 hours to do all the end fittings, so all up her
labour, the cost of hose, and the fittings cost a bit over $400.
The new dryer, new TX valve, reco'ing the compressor, all new o-rings and
testing and gassing the system was another a bit over $400.
Then probably another $200 on thermo and materials for the bull bar
brackets.
The hidden cost is the huge amount of time it took me to fit the whole
thing into my car (more work than the engine conversion almost) ![]() .
.
And of course the time Brad put into it at the end, I'm sure I will pay
him back for that in some way with my engineering / drafting services.....
![]()
So anyway, It all works!!!
I'll try to post some more pics tomorrow.
Sunday - 3rd September
Some
pics of the mess of hoses and dryer mounted in the front. When I get a
chance I will try to make things look neater. There's a cover over the
condensor / thermo and some insulation to keep the heat away. ![]()
and here's the compressor all mounted and working (needs a good clean back there);
And I made a little animated gif to show just how much fun the climate control is
![]() . Driving around today it was great to just set it to 24 degrees C and let it do it's thing
. Driving around today it was great to just set it to 24 degrees C and let it do it's thing
![]()

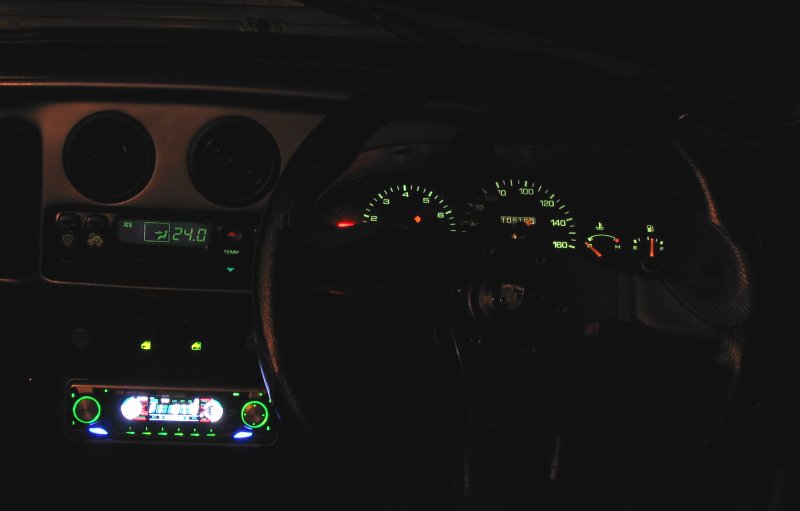
I forgot to post a pic of the finished dash;
A pdf of the current Vehicle
Specifications can be downloaded here; 2006_Baja_Specs.pdf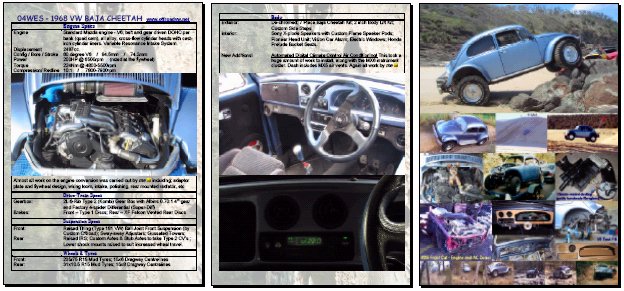
Back to my V6 transplant diary