[09 Dec 10] Been
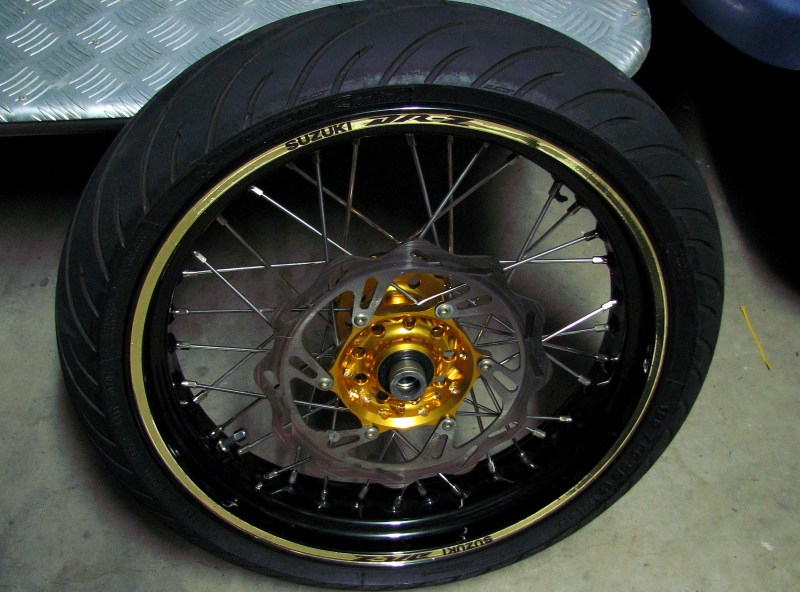
taking advantage of the strong Aussie Dollar. Have bought a pretty gold
anodised 44T Talon Radialite rear sprocket from the UK for $46 (for the
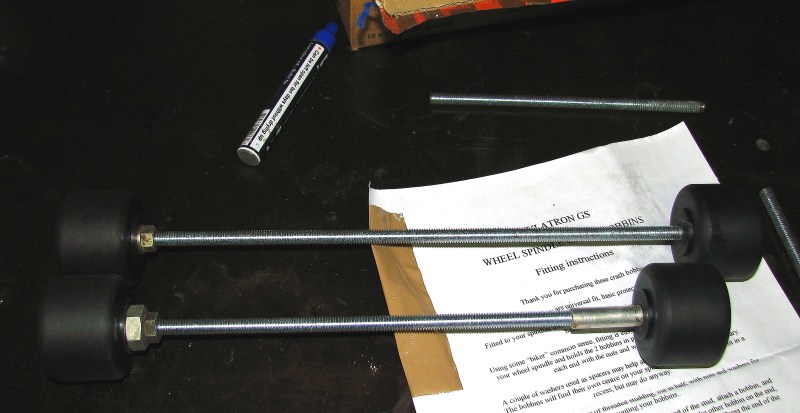
motard rims), a set of motard axle sliders for $36 from the UK, and
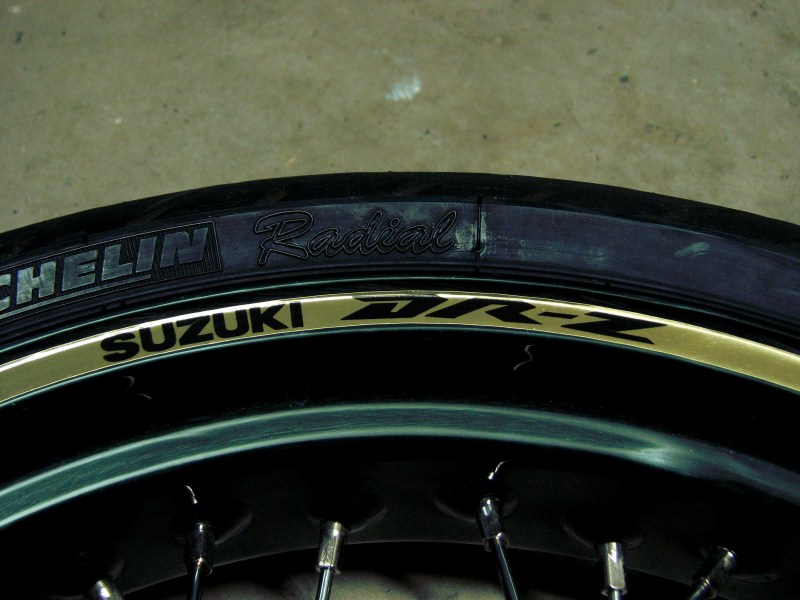
some gold reflective custom Suzuki DRZ rim stickers for $12 from the US!
[13 Oct 10]
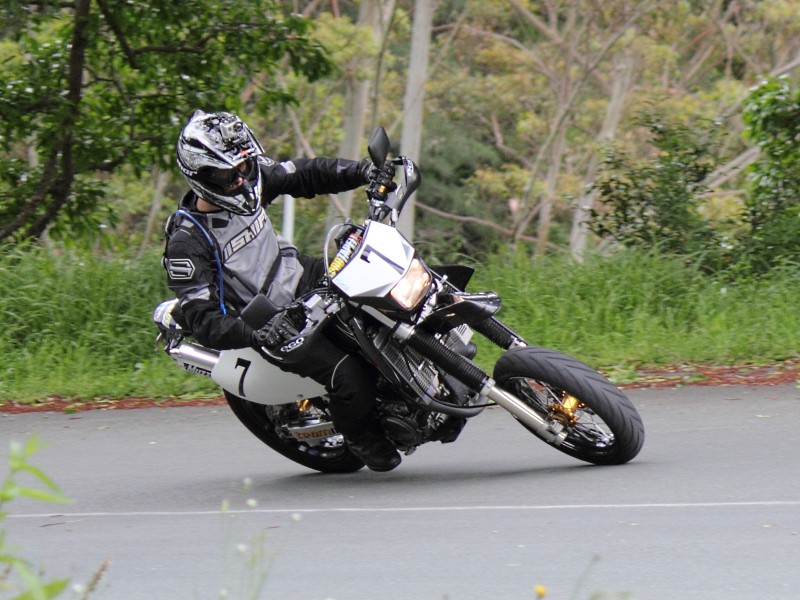
Finally got some mostly dry roads to try out the motard. The fun twisty
roads were still oozing water from all the joints and were wet in the
particularly shady areas. Some of the water crossing were also still
partly under.
But despite the still crappy conditions the motard was fun! It
obviously weighs heaps less than my usual commuter (my 650 Vstrom) and
was fun to throw about in the twistier sections of road. It's
definitely more nervous than the Vstrom and was a bit all over the
place on the rougher surfaces. That's the Vstrom's strong point, really
stable no matter what the road surface and it changes line mid corner
without complaint.
The motard is very anti-social. It wants to wheelstand off from every
set of traffic lights, and basically anytime you give it a squirt in
2nd gear. I noticed the front wheel letting out a little chirp as it
comes down. I then watched the speedo (driven off the front wheel) and
the motard front wheel definitely doesn't keep spinning as long as the
dirt front wheel does. Probably something to do with the brand new
tight front wheel bearings and seals that I just put in there.
The front brake feels suprisingly strong despite the stock size disc.
The smaller diameter road front wheel means the brake is actually more
sensitive than with the larger diameter dirt front wheel. I guess I
will have to wait until I hit a good long downhill section like Mt
Glorious to see how quickly it starts to get too hot and fade.
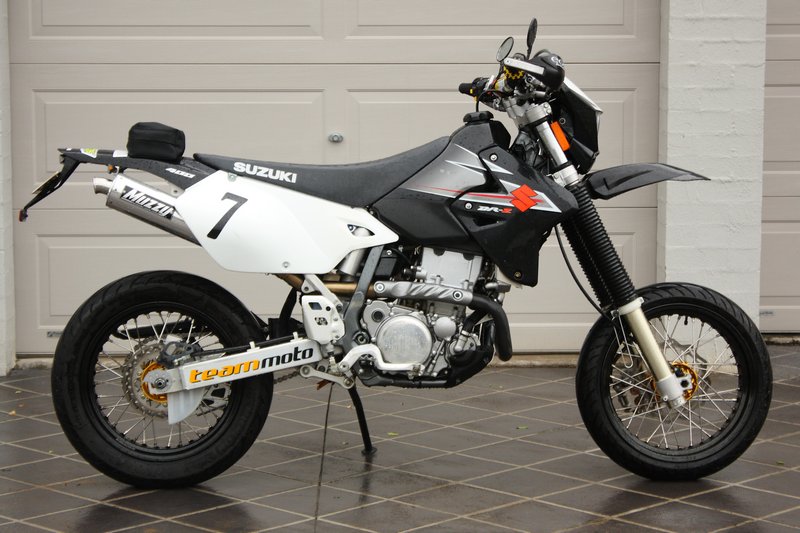
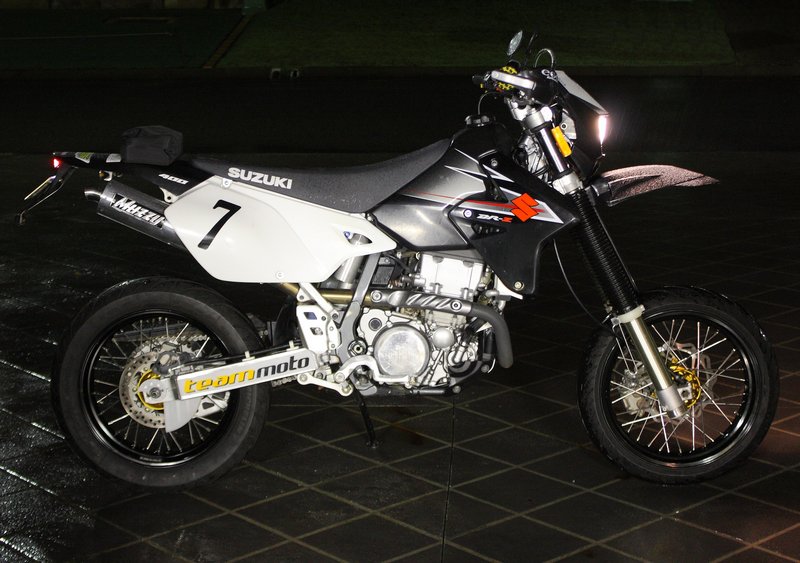
[10 Oct 2010]
daytime pics, pity it keeps
raining!
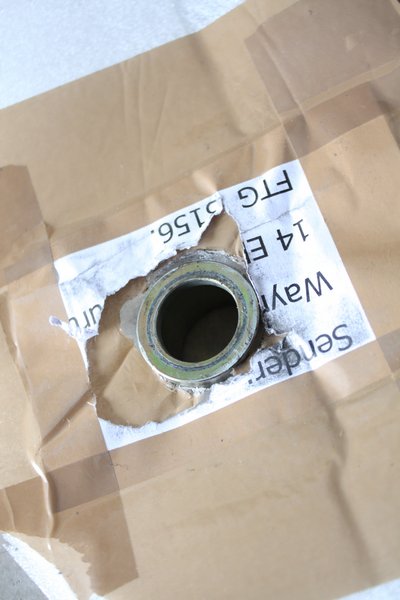
[09 Oct 2010] - My
wheels arrived via pack and send yesterday. When I had a look this
morning I noticed the wheel spacer sticking through the packaging, and
the big zip tie that was put through the axle hole to stop the spacers
falling out were broken. Clearly pack and send put these on their side
and let them slide about.
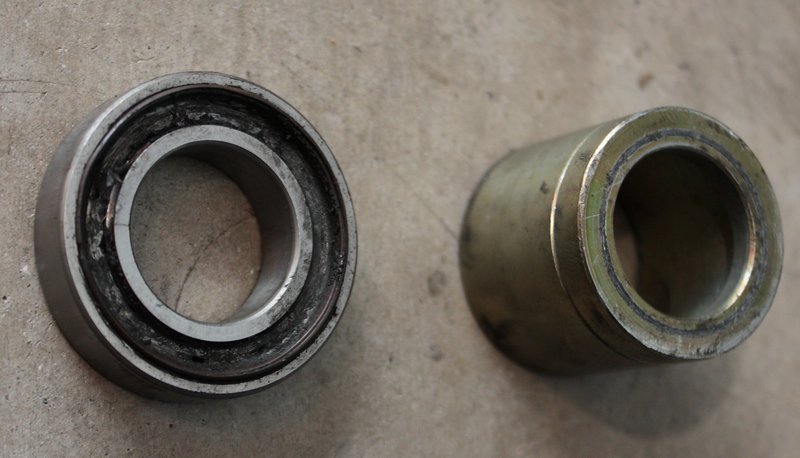
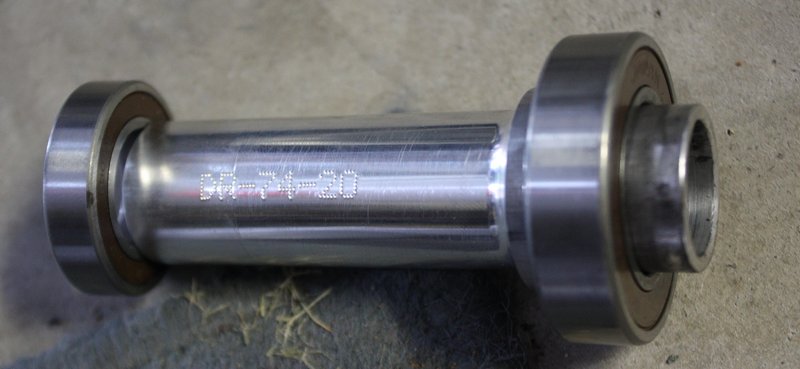
Once unpackaged I noticed the front wheel bearings felt pretty bad. So
I pulled them apart and found the space it was resting on pressed on
the bearing seal/cage and crushed the speedo side bearing
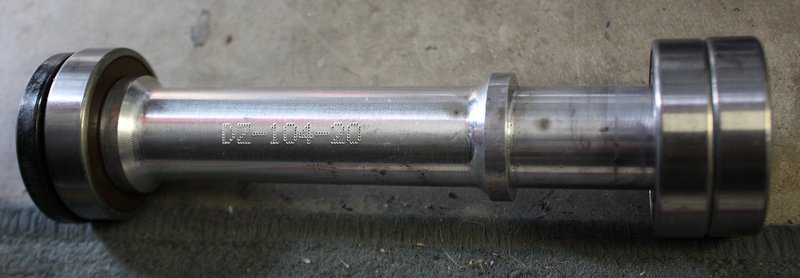
The back felt a bit weird too, so I decided to just replace all of the
bearings to be safe.
The front runs a big 6005 on one side and a small 6904 on the speedo
side
The back runs 6005's, two on the chain side and one on the brake side
The 5 bearings and 3 seals cost $77 at the local bearing shop.
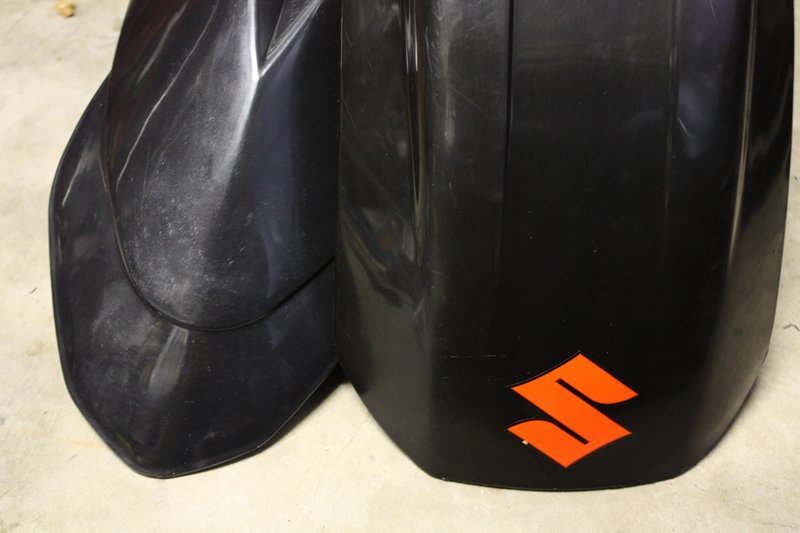
I also ordered a motard fender from ebay. I thought it was an acerbis
one, but it's a copy of an acerbis one. Unfortunately the black is a
different black to the rest of the bike so it looks a little funny. New
and stock fenders below
So I put it all together and took it for a spin. Unfortunately it's
p*ssing down rain :(
It seemed to go alright. The front fender isn't so good in the wet, a
water spray comes over the front of it constantly. Need to wait for the
dry to give it a good test
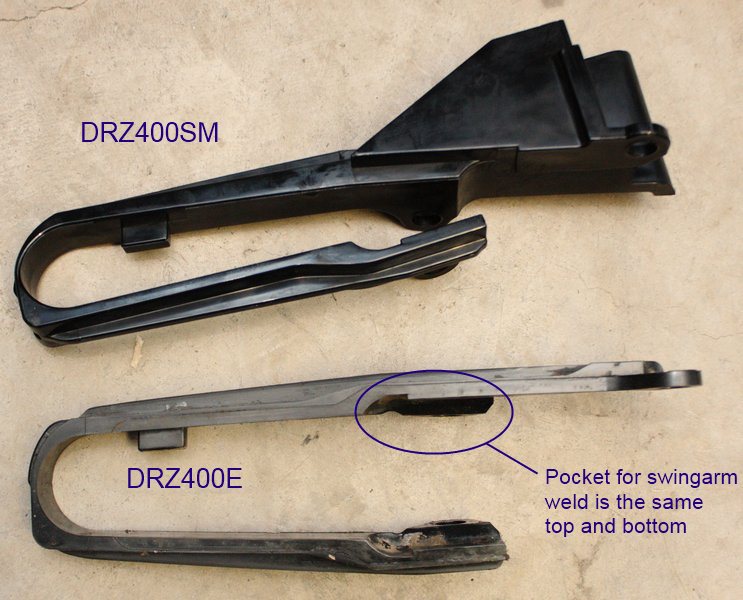
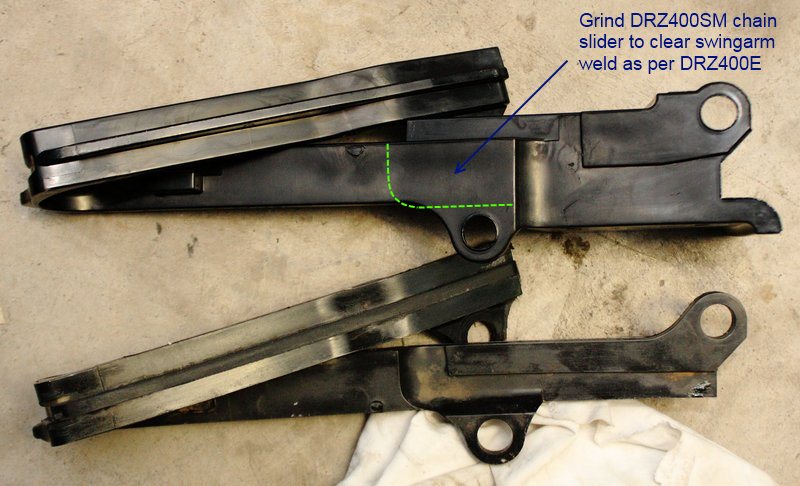
[06 Oct 2010] - Ok,
so I got the SM chain slider today. It's almost a bolt on, it just
needs a bit of grinding to make it clear the swingarm weld as per the
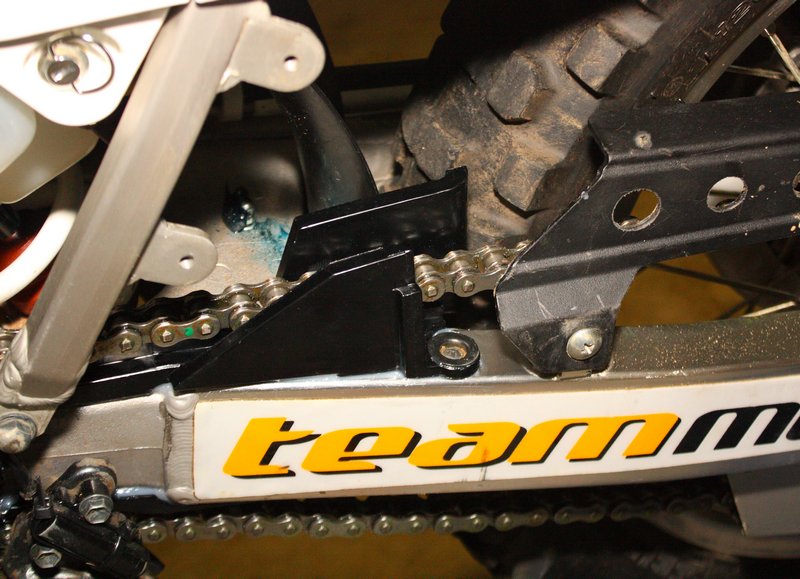
DRZ400E chain slider. Once clearanced I also siliconed the slider onto
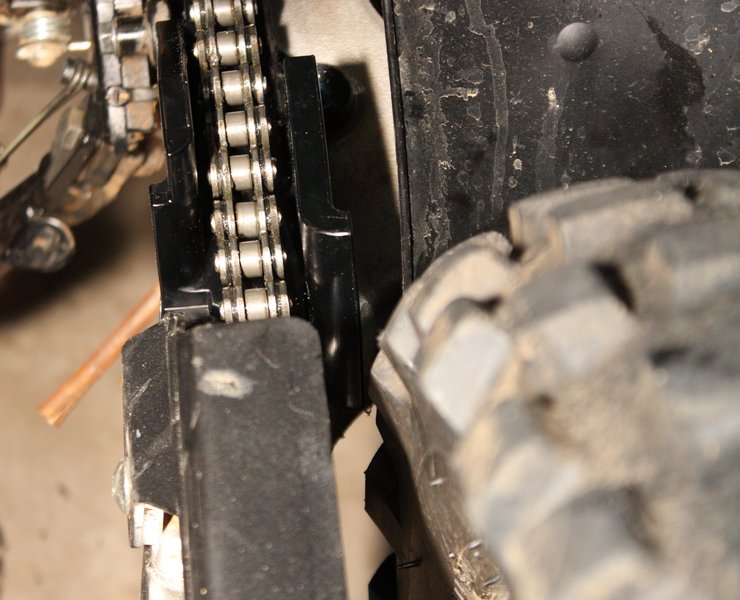
the swingarm just to make sure it contacts well underneath and doesn't
rattle about at all. It comes quite close to the knobby tyres, it might
even need to be clearanced when running a big tyre with the axle all
the way forward in the adjuster (this is on adjustment 2 of ~7).
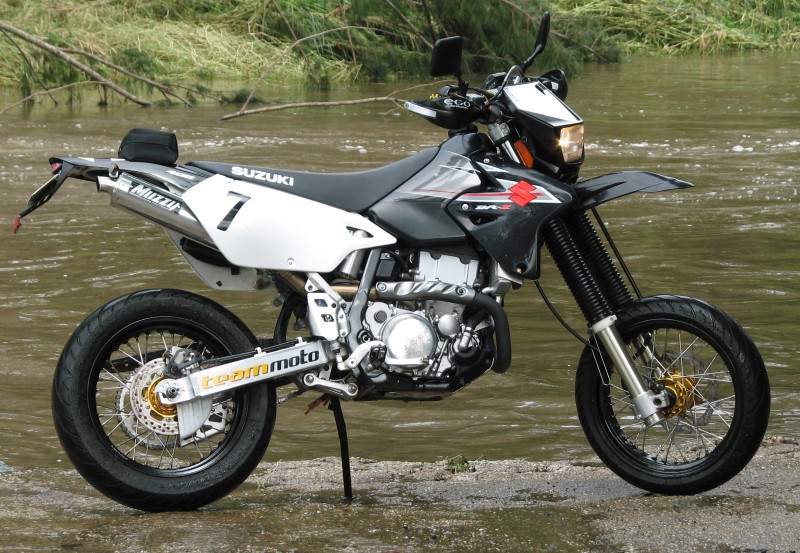
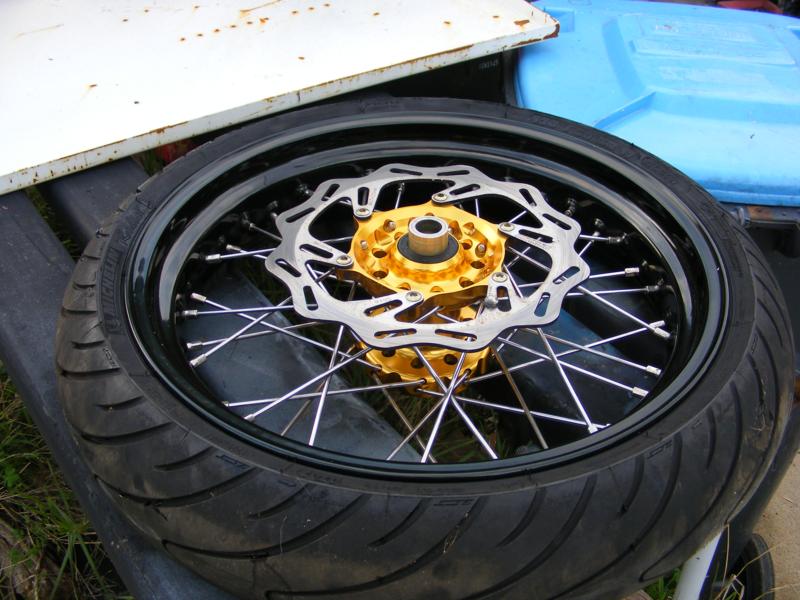
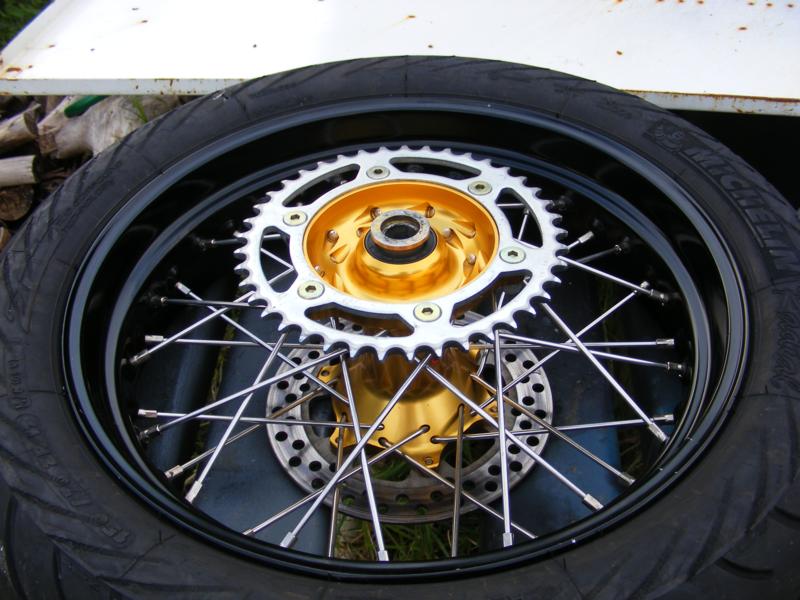
[05 Oct 2010] - It
is about to become a motard. I came across a set of Motard wheels for a
DRZ400E for an excellent price. They were $500 plus $108 shipping (Melb
to Bris) 2nd hand. They are Morad rims, Talon hubs and come with brakes
/ sprocket /tyres. Hopefully they will arrive before the weekend.
Clearly the chain rubbed on those wheels, but the owner said he fixed
the problem by installing a DRZ400SM chain slider (which has the big
side wings). So I have ordered the following for my motard conversion;
- DRZ400SM chain slider - Part #61273-29F20
$91.95 from
Suzuki
- DRZ400SM speedo drive (make stock speedo
accurate) - Part
#54600-29F10 $62 from UK ebay
My next problem is figuring out what to do
about gearing / sprockets. I
want to do as little as possible to change from dirt to motard, as I
will mainly use the bike as a dirt bike. I ride my Vstrom to work
everyday. The stock size front disk makes the front easy. On the back I
reckon I can only run a 43/44 rear sprocket and still have enough chain
adjustment to use the 47 on the dirt rims. I'm trying to decide if I go
to a 15 on the front (currently 14) and just put up with the slightly
higher dirt gearing (I could always put the 14 back on if I wanted to
do serious / slow dirt work).
[11 Sep 2010]
-
New tail fitted up. You can see I reused the stock
rear reflector. In Australia you need a vertical rear reflector, number
plate light, stop / tail light, and indicators. Indicator lenses must
be at least 180mm apart and the tail must extend down to a point 45
degrees above the rear axle. I hung the stock rear reflector under my
Acerbis CE tail.
color="#000000">
color="#000000">

Wiring
the LED indicators wasn't very straight forward. There are heaps of
DRZ400S/SM/American E wiring diagrams on the internet, but they are all
different from the Aussie model. For some reason on the Australian
model Suzuki decided it would be a good idea to connect the left turn
signal "+"ve wire and right turn signal "+"ve wire to each side of the
pilot light on the instrument cluster. So basically when the right
indicators are on then the pilot light earths itself through the left
indicators and vice versa. This works for the normal incandesant
indicators, but not the LED indicators. When you fit LED's (without
load resistors) the feed back through the pilot light is enough to
light both sides of the indicator circuit. See my paint.net mark-up of
the wiring diagram below.
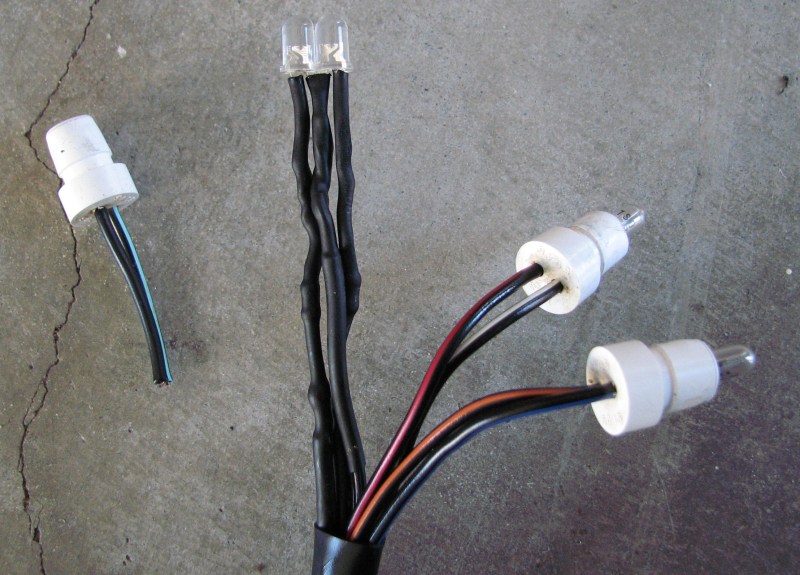
The
easy solution is to just remove the pilot light from the instrument
cluster to break the circuit. The better solution is to modify the
wiring to make it more like the S model diagram. I cut the pilot light
bulb out of the harness, then put two LED's on. One powered by the
greeny coloured right indicator "+"ve wire, the other powered by the
black coloured left indicator "+"ve wire, and then both earthed to the
nearest earth wire that I could find on the bike. I then glued the
LED's together with an expoxy glue and put them into the instrument
cluster with a little silicone to seal it and hold them in place. So
now my instrument cluster warning light lights up a little more on the
right or left side depending on which indicator I have on.
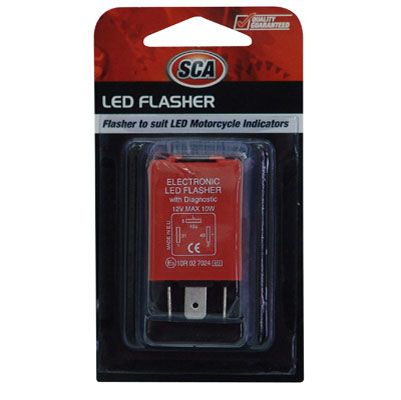
The
flasher unit problem is well documented on the net. Basically you need
a flasher unit that is not load sensitive, generally called an LED
flasher unit. The problem is Suzuki have a weird 7-pin flasher unit
which is linked with the side-stand / clutch cut-out relay. Fixing the
problem is easy. Find the original 7 pin relay behind the headlight,
and disconnect the blue and orange wires. Then run the orange
wire to the "+"ve of the LED flasher, the blue to the output of the
flasher and if you get a 3 pin flasher then run the ground pin to a
ground wire. I wanted to get a Narva flasher, but Repco didn't have
any. So I got the Supercheap Auto version instead, which looks
remarkably similar. Actually I bought a Chinese ebay LED flasher first
(for $3.89), but it didn't work :(
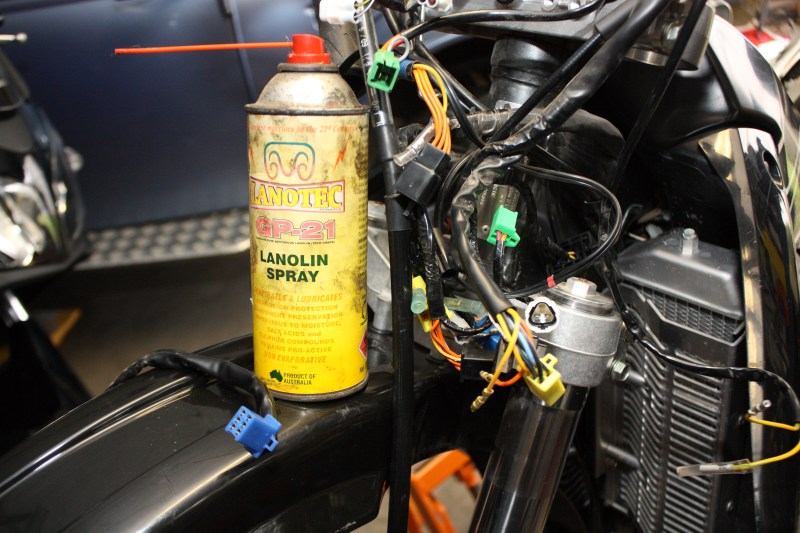
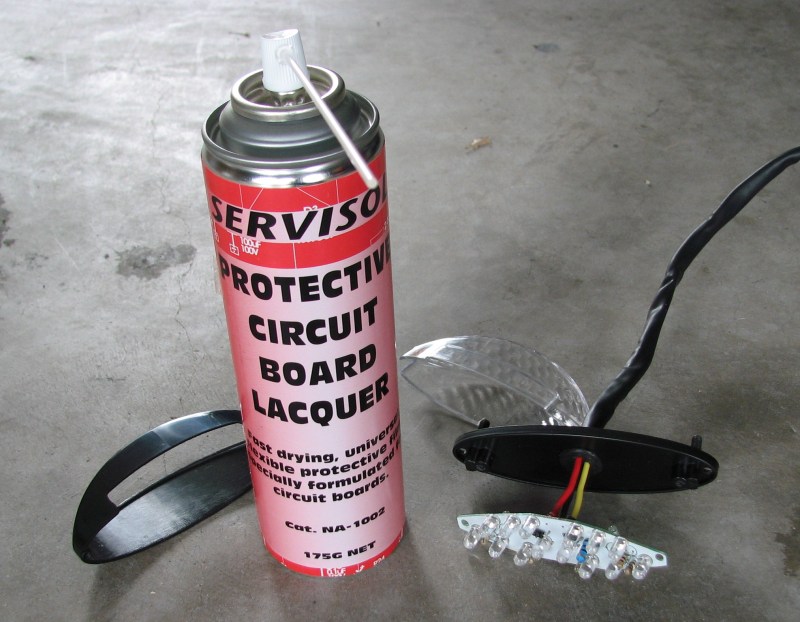
Whenever
working on wiring looks I spray all connections with lanolin oil spray.
This puts a corrosion resistant layer of lanolin oil on everything,
seems to work for the terminals and connections on my car which sees
beach work. I also sprayed the tail light and led indicator circuit
boards with a circuit board lacquer, I bought this stuff from Jaycar.
Then I siliconed the lenses on to waterproof all the LED lights. I made
sure I bought a waterproof silicon which said "non corrosive".
[09 Sep 10] -
I
thought I'd
update an old
thread. DRZ has been going great, having lots of fun. I have some force
radiator guards now, but still haven't sorted a bash plate.
I've just got some XR mirrors for it which I plan on mounting off the
bark busters, will see how that works out.
Keen on sticking with the stock headlight as it works so well. The
stock steel brackets for the headlight weigh 458g which is pretty heavy
for a couple of simple brackets. Might replace them with aluminium or
something.
I bought some indicators and an Acerbis CE tail-light. The tail
assembly looks cool, but gets covered by our huge license plates. Just
gotta wire everything to the bike and make mounting brackets etc. Had a
trial fit tonight (as parts just arrived in the post today).
__________________
[07 Apr 10] - Got force radiator guards and pro taper handle bars for
my birthday.
[02 Jan 10] -
Up
to 500km now,
changed the
oil and filter last week. I'm very happy with the bike, goes very well
indeed. Found the rev limiter a couple of times, when I was riding in
the rain on the road and found out it still gets wheelspin at 90kph.

Suspension works very well, it hasn't shown any signs of bottoming out
or anything with my 60kg of body weight.
I seem to have worn my boots in now, tried the "wetting them first then
riding all day" trick. When I first tried to ride with them I couldn't
change gear and actually got the boot stuck between the lever and the
footpeg. Fixed that by raised the lever 1 spline and replacing the huge
22mm OD rubber end on the stock shifter with a bit of 8mm fuel hose
(about 14mm OD).
__________________
[19 Dec 09] -
So I
put my
AU$42 case
savers on today. They came in a brushed finish, so I thought I might as
well hit them with the polishing wheel.
while I was at it I ground this sharp edge off the inside edge of the
gear lever to stop it going through the case
so now it looks like this (the relocated indicators blend in well)
__________________
[14 Dec 09] -
I
messed about
this morning
trying to work out how to relocate the blinker and not have it look
like total crap. I ended up making some little plates out of aluminium
that cover the stock hole and act as a bracket to move the indicator
back and up. It looks relatively neat and has solved the melting
blinker problem.
I went for a spin with my mate this afternoon and I reckon it goes
better now with the new muzzy and air box mod. I still wasn't screaming
it but she grunts along very well on our local patch of bush. Even
found some hills with 4th gear water-bar jumps to play on
Am running the screen and quiet insert on the Muzzy. Tried it without
first and it was fricken loud! With the quiet bits in it's probably
similar to stock on part throttle cruise but have more of a bark when
you get into it or blip the throttle
__________________
[12 Dec 09] -
I
got the mid
pipe on today.
It tilted the muffler up towards the indicator a bit more. I thought
"hmmm, that's a bit tight, hope it doesn't melt the indicator".
So I went for a spin with my mate following me. We got a couple of kays
up the road and as I came to a stop for the T-intersection I heard my
mates horn and then saw the cloud of smoke go past me. Turns out when I
slowed down it decided it would be a good time to almost catch fire

So if anyone puts a muzzy on with stock indicators, look out!
Now the obvious solution would be to put a smaller aftermarket tail and
indicators on there, and well ultimately that will happen. For now I am
just messing around with moving the stock indicators up and forward on
the existing tail.
And if people wonder what the air box 3x3 mod on a DRZ looks like, it's
this. Pulling out the snorkel from the top of the air box. Restrictive
looking little sucker!
[11 Dec 09] - I went out this morning in the daylight and had another
look at the overpipe looking thing stopping the mid pipe going on. At
night it looked like it was a thin metal gasket overtop of a metal
overpipe. But in the daylight it looked like a thick metal gasket
butted up against a short overpipe. So another more vigorous attack
with the pipe grips and I managed to get it off. It was just a gasket
afterall. So I will be able to finish putting the exhaust together with
no problems after all
[10
Dec 09] -
The Muzzy
arrived today. 7 days delivery from the US is pretty good.
Stock DR ready for some tweaking;
new Muzzy with quiet insert and spark arrestor. This goes in the end
cap, 3 allen head bolts to remove.
Stock exhaust weighs 3.4kg, Muzzy weighs 2.4kg.
I tried to put it on but the mid pipe wouldn't slide on far enough
There is some weird overpipe welded to the stock header that won't let
the mid pipe slide on properly. I guess I will have to pull the header
off and grind this overpipe off (Saturday perhaps). I did ask if it
would fit an Aussie 09 E and they said they had no idea

So I whacked just the muffler on to see how it looks.

[03 Dec 09] - One thing I don't like on the stock bike is
the exhaust. It sounds pretty crap and when I pulled it apart I can see
why, it's a big hollow pipe with very little muffler packing. I was
going to make a proper core for it and use lots of muffler packing
(someone on the net had already done something similar), but then I saw
this;
* Muzzy slip-on for a bit less than AU$200 delivered on ebay from
TeamMuzzy
Also just ordered some CFC case savers off ebay. AU$42.73 delivered
from the manufacturer.
[26 Nov 09]
- This
page will eventually contain details of my 2009 DR-Z400E. So far I only
have Ego Barkbusters on an otherwise standard black bike.
I've
clocked up 115km and the bike feels great compared to my history of
crap dirt bikes :). On the road it feels pretty aweful compared to my
Vstrom, but that's to be expected. Offroad it makes the Vstrom feel
like a Harley - I guess 70kg less weight and knobby tyres will do that.
The stock DRZ bars are pretty crap. I'll get something a bit higher
with a nicer shape later on, possibly once I bend the stock ones.
Links;
Australian
- Most info is E model based as you'd be silly to buy the S over here.
Other Countries
- A lot of the US info is based on the crap S version, the E isn't road
legal in many states.
Weight of DRZ bits and pieces
This is a table of the weights of different parts that I have removed
from or added to my DRZ
| Part |
weight (g) |
#
of |
Total (g) |
| Stock Parts |
|
|
|
| stock drz headlight with alignment bracket |
657 |
1 |
657 |
| plastic headlight surround |
363 |
1 |
363 |
| headlight fork mounting brackets |
229 |
2 |
458 |
| headlight assembly |
1478 |
|
|
| |
|
|
|
| stock mirrors |
465 |
2 |
930 |
| stock steel handlebars |
796 |
1 |
796 |
| stock muffler |
3400 |
1 |
3400 |
| stock front indicator |
131 |
2 |
262 |
| front indicator bracket |
53 |
2 |
106 |
| front side reflectors |
174 |
1 |
174 |
| stock radiator air vanes |
93 |
2 |
186 |
| chain noise abatement panel |
95 |
1 |
95 |
| helmet lock |
174 |
1 |
174 |
| horn bracket |
53 |
1 |
53 |
| number plate to tail steel bracket |
98 |
1 |
98 |
| numberplate tail piece with indicators |
1024 |
1 |
1024 |
| Speedo |
364 |
1 |
364 |
| speedo bracket |
78 |
1 |
78 |
| |
|
subtotal |
7740 |
| Aftermarket bits |
|
|
|
| peppershield - headlight protector |
50 |
1 |
50 |
| bark buster |
415 |
2 |
830 |
| Pro taper
7/8" KX Hi |
958 |
1 |
958 |
| Mountain Bike Mirror |
50 |
2 |
100 |
| Muzzy exhaust |
2400 |
1 |
2400 |
| led indicator |
32 |
4 |
128 |
| acerbis tail with license plate and reflector |
345 |
1 |
345 |
| |
|
subtotal |
4811 |
| spare tube, tyre levers, pump in fender bag |
1330 |
1 |
1330 |
| XR mirror |
235 |
2 |
470 |
One
out of
the Box
This
is the bike that, unlike any other, fits the description of a
dirt-churning weapon. The bike that year after year rocks its rivals,
this year comes loaded with high-tech ammunition.The DR-Z's motivation
comes from 398cc of displacement, DOHC with four huge valves and liquid
cooling. The forged piston is 10% lighter than one conventionally cast,
an L-shaped top piston ring reduces blow-by, while copious use of
aluminium and magnesium lowers weight and improves heat transfer.
Putting
this power into practice you get a thumper producing great wads of
power right off the bottom, a strong delivery that builds right through
the mid range and enough torque to grunt you up anything. No wider than
many 250's, yet just as agile, the seat is comfortably rounded, the
steering poised and precise.The frame is thin-wall, chrome-moly steel
tubing in a combination of round and rectangular cross-section,
delivering superb rigidity with minimum weight.
Toss
it around, hammer it through hoops, the compliant, long travel front
forks feature large, 49mm stanchion tubes. Rear suspension features a
Showa rear shock with both high and low speed compression adjustment.
Everything you want, including wide RM- style footpegs and a
lightweight headlight unit. The 100% street legal DR-Z400E.
Electrifying your adrenaline like no 400 has ever done before.
Features
-
398cc,
4-stroke, liquid-cooled, DOHC, 4-valve engine produces broad, tractable
power and torque, and features compact, streamlined design for the
double advantage of low engine positioning and extra-slim, off-road
rider-friendly chassis.
-
Suzuki
Composite Electrochemical Material (SCEM) plated engine's aluminium
cylinder for durability, weight reduction and superior heat transfer.
-
KEIHIN
FCR39SS
flat-side carburettor for seamless, smooth engine power delivery.
-
Dry-sump
oiling
system makes crankcase compact.
-
Magnesium-alloy
clutch, magneto and cam covers contribute to weight reduction.
-
Digitally
mapped DC-CDI system monitors throttle position/engine rpm and adjusts
ignition timing to maintain efficient combustion.
-
Rider-friendly
electric engine starter with compact electric starter motor.
-
Automatic
decompression system lifts one exhaust valve at cranking rpm for easy
starting.
-
Powerful
250mm front
disc brake with dual-piston caliper and 220mm rear disc brake with
single-piston caliper.
-
The
DR-Z400E's
bodywork features smooth transitions between the tail and seat to
facilitate machine control on off-road.
-
Long-travel,
49mm-stanchion-tube front forks with protective rubber boots and
progressive-linkage rear suspension system are both multi-adjustable.
-
Progressive-linkage
rear shock absorber system for excellent rear wheel traction.
-
Aluminium-alloy
engine guard plate protects the bottom of engine.
-
Narrow
frame made of thin, round and rectangular chrome-moly steel tubes for
exceptional torsional rigidity with minimum weight and lightweight
aluminium bolt-on rear subframe.
-
Air
filter can be accessed with your bare hands, grease nipples of the
swingarm pivot and shock absorber linkage bearing, and clutch cover can
be removed without draining the engine coolant all for easy
maintenance.
-
Easy-to-read
multi-function digital instrument includes speedometer, odometer, dual
tripmeters with both addition and subtraction functions, clock and
stopwatch with subtraction capability.
Aussie
DR-Z400E (and S)
Specifications
| Model |
DR-Z400EK9 |
DR-Z400EK7 |
DR-Z400SLO and DR-Z400SK9 |
| Year |
2009 |
2007 (or 2008?) |
2010
and 2009 |
Engine
|
398cc, single cylinder, 4-stroke, liquid-cooled,
DOHC |
398cc, single cylinder, 4-stroke, liquid-cooled,
DOHC |
|
Starter
|
Electric (optional kick starter) |
Electric |
Transmission
|
5-speed constant mesh |
5-speed |
Front Suspension
|
Telescopic,18-step rebound 14-step compression
damping |
Telescopic, oil-damped, adjustable
compression and rebound damping
|
Rear Suspension
|
Swingarm, progressive linkage, 21-step rebound,
3.5 turn high / 20-step low speed compression damping, adjustable
spring preload |
Link-type, fully-adjustable spring
preload, adjustable compression and rebound damping
|
Front Brakes
|
Disc |
|
Disc |
Rear Brakes
|
Disc |
|
Disc |
Wheelbase
|
1,475mm |
|
1,485mm |
Length
|
2,310mm |
2,235mm |
2,310mm |
Width
|
825mm |
|
875mm |
Height
|
1,235mm |
|
1230mm |
| Seat Height |
935mm |
945mm |
935mm |
Curb (wet) Mass
|
138kg |
|
145kg |
| Dry Mass |
|
119kg |
132kg? |
Fuel Capacity
|
10 litres including reserve |
|
10
litres |
Colours
|
Champion Yellow or Black |
Champion Yellow No.2 |
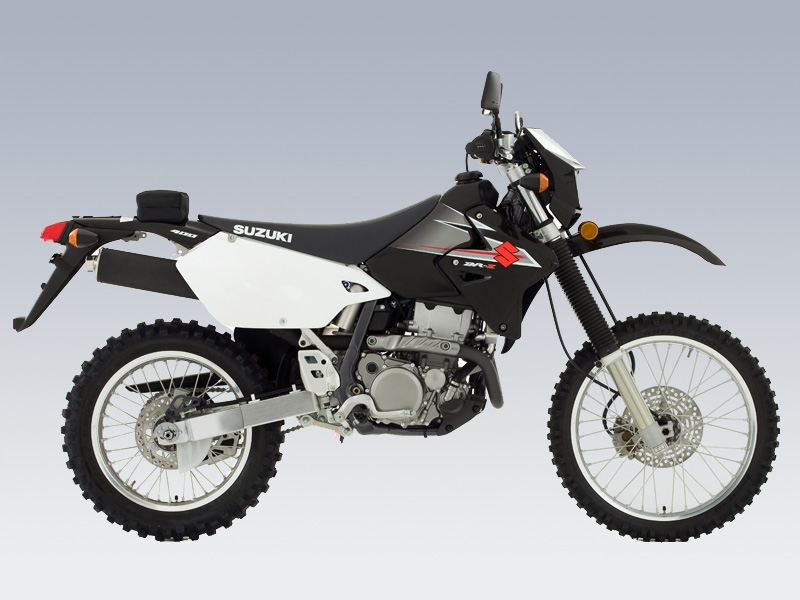
LO
- Black, K9 - White |
Warranty
|
12 months unlimited kilometres |
|
12
months unlimited kilometres |
Options;
-
DR-Z400E LOW GEL SEAT - $294 AU
-
DR-Z400E Kick Starter Kit - $328 AU